Gingerbread recipe from Food.com
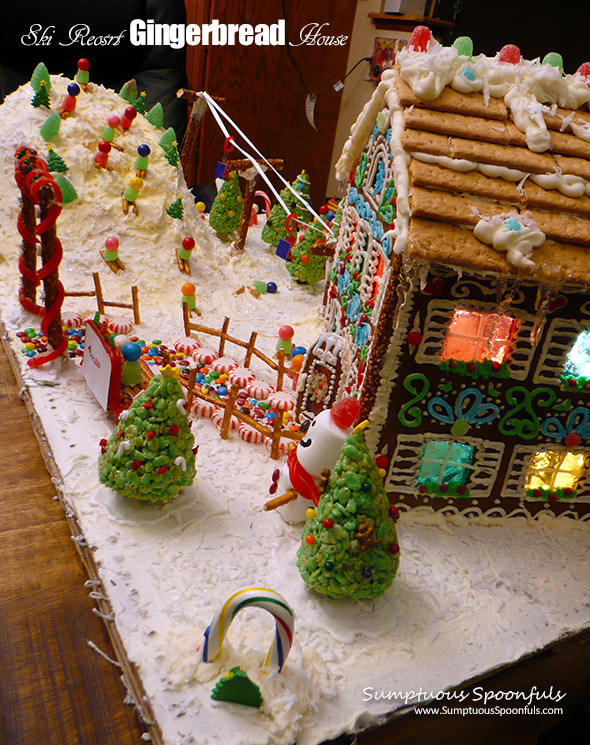
There was a gingerbread house competition at work last week. Our boss asked for volunteers to create a house to represent our team and of course I raised my hand (… or, more accurately, I responded to her email). I didn’t know who else signed up until the initial meeting … but once we had the meeting and I saw who was involved, I was super excited to work with such a great team of creative intelligent people! Everyone had ideas and things they wanted to contribute and somehow none of our ideas clashed. We got together for a planning session and looked at lots of lots of gingerbread houses online. We settled on a ski resort theme.
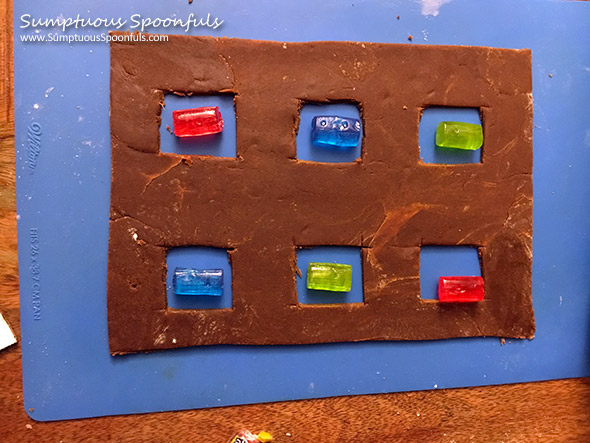
I baked the gingerbread at home (recipe below), using Jolly Ranchers for the stained glass windows. The best technique is to roll out the gingerbread on silicon baking mats, cut to the size/shape you want, then slide the mat onto a baking sheet and bake. Here’s a shot of one of the sides of the house before it was baked.
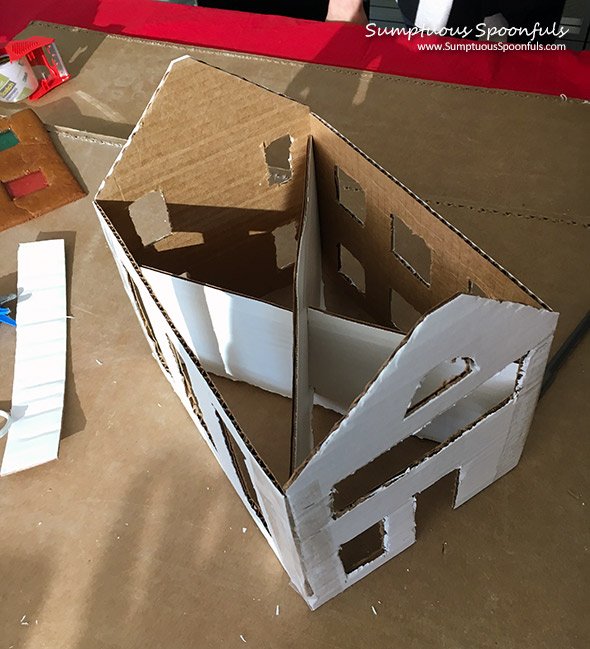
For structural integrity (very important!), we made a cardboard sub-house, strengthened with cardboard crossbeams in the middle. We cut out holes for the windows because we wanted them to light up.
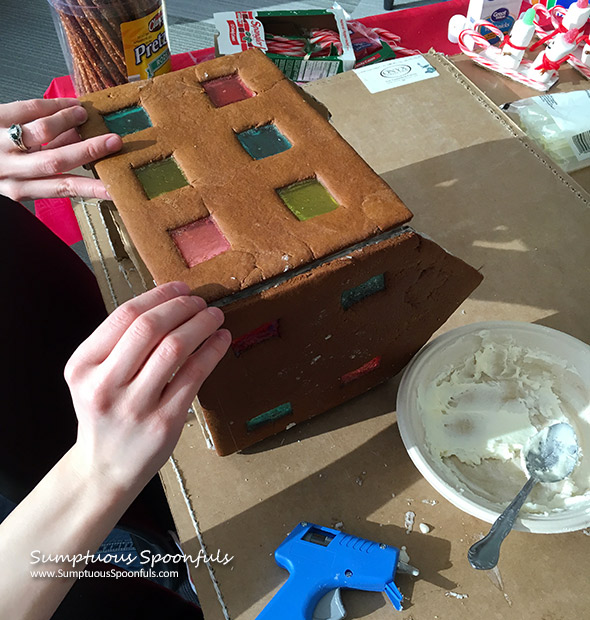
We fastened the gingerbread to the cardboard using frosting, and then used a hot glue gun to seal the edges.
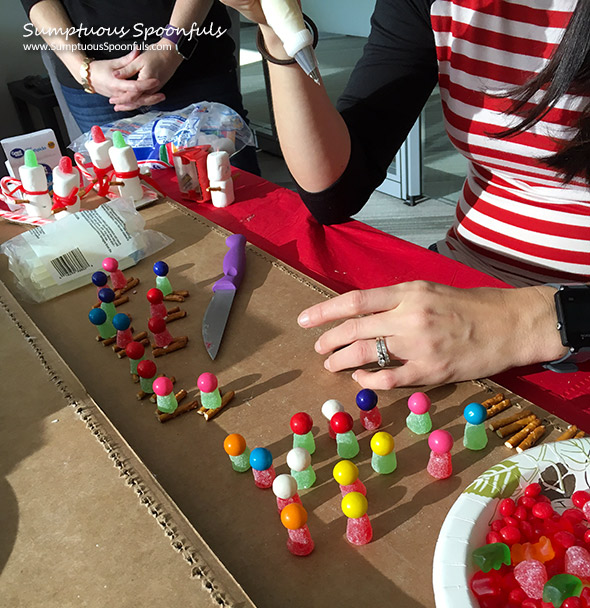
Our little people were made of gumdrops and gumballs, with pretzel sticks for skis. We tried putting them together with frosting, but when some of them fell apart, we brought out the hot glue gun.
Jasmin volunteered to make the hill … she used an aluminum roasting pan for the base, which we propped up (glued onto) some stacked plastic cups to give it more height (or it might have been pretzel rods … I was busy fetching things at this point so I didn’t witness the whole process), then she draped cheesecloth over top and used a flour/water paste to stick it all together. She glued marshmallows in the middle of the hill for moguls. Here it is before we frosted it:
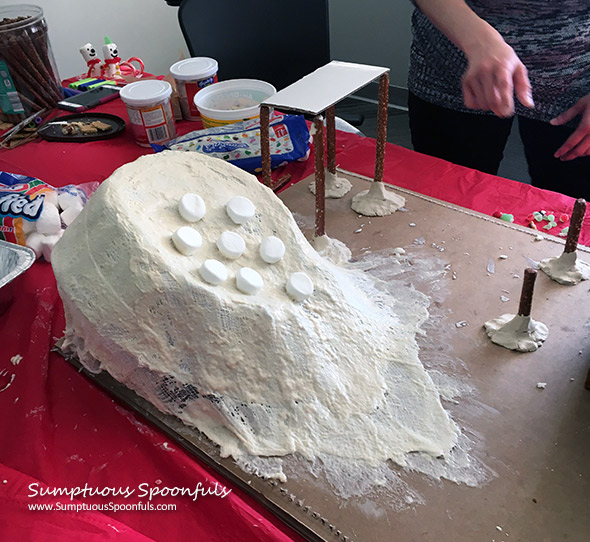
and after:
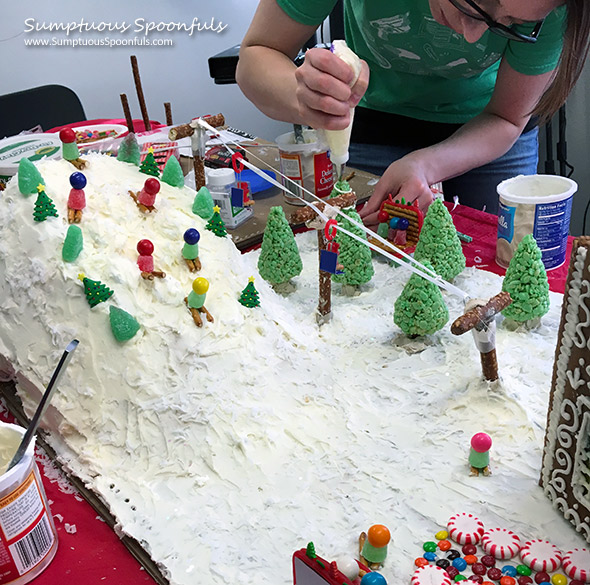
We added some gumdrop trees and some of those gorgeous pre-decorated trees to the sides of the hill. We sprinkled the “snow” frosting with coconut and clear glitter to make it sparkle like snow does.
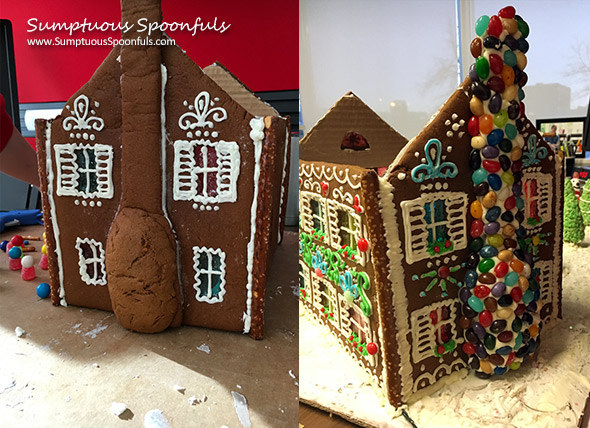
Andrea really wanted to incorporate piped frosting swirls on the ski lodge. We gave her creative license to decorate the ski lodge as she saw fit and she did such a beautiful job!
The chimney was made of gingerbread, then frosted and we added jellybeans for the stones.
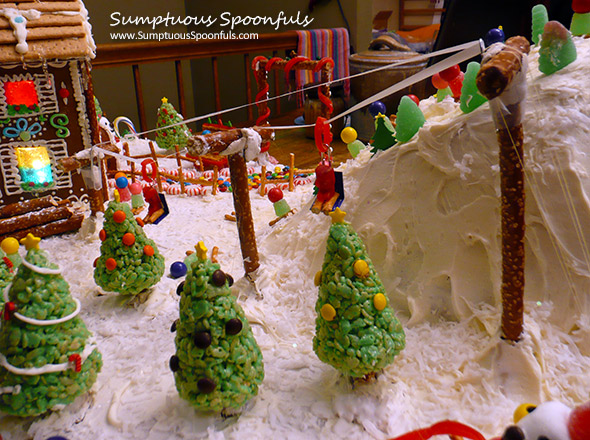
To make the ski lift, we used modeling clay and pretzel rods to make the supports, then fastened on a couple paper clips. We used ribbon for the supporting cables and made our little chairs with gummy bears, a paper clip, licorice whip and a bit of cardboard to make the seat. Hot glue held the bear chairs together. We used this tutorial from Science Buddies to make our ski lift functional. Our modeling clay didn’t hold quite as well as we wanted, so we had to use some thread (taped to the bottom of the support) to straighten the top and bottom supports.
Nicole made the bigger trees from Rice Krispie treats, colored green, with pretzel rods for the tree trunks. We used white modeling clay to stick the trees to our cardboard base and hot glue to glue the ornaments on the trees.
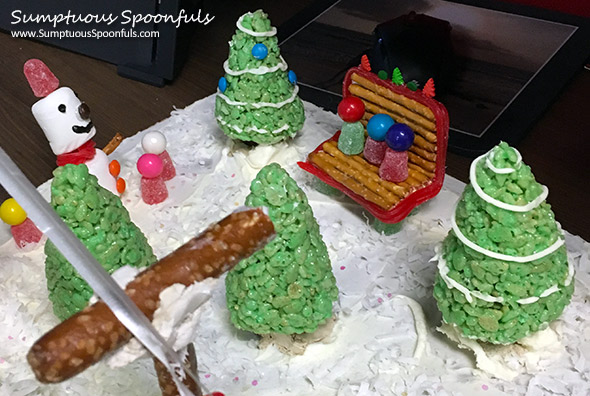
Snowmen were made with marshmallows, toothpicks, mini M&Ms for the buttons and licorice whips for scarves. We used black frosting for the eyes and smiles and gumdrops for the hats.
Dhanya made pretty icicles for the roof and crafted the entryway and the fence.
We made benches with cardboard, pretzel sticks, licorice whips and some sprinkles for decoration. Gumdrops became the “feet” for our benches. (These were originally going to be our chairlifts, but they were WAY too big for our little lift.)
I’ve included the recipe for the gingerbread. I used the entire batch of dough on the gingerbread house–I was advised not to make gingerbread for the roof. For the roof, we used cardboard topped with graham crackers, frosting and gumdrops.
A string of Christmas lights went inside the house, to light up the windows, just before we put the roof on.
We were really really proud of our epic gingerbread ski resort. I wanted to bring you along on the whole creative journey, but it’s so hard to show you the whole experience! I so want to thank my employer DocuTAP for this amazing gingerbread journey. I love working there … and love the creative energy that surfaces whenever there’s a competition. Ours was just one of many amazing, funny, beautiful, and amazingly creative entries.
Print
Gingerbread (for gingerbread people or houses)
Ingredients
- 1/2 cup sugar
- 12 cup molasses
- 1 1/2 teaspoons ginger
- 1 teaspoon allspice
- 1 teaspoon cinnamon
- 1 teaspoon ground cloves
- 2 teaspoons baking soda
- 1/2 cup butter, softened
- 1 egg, beaten
- 3 1/2 cups all-purpose flour
For the stained glass windows: hard candies such as Jolly Ranchers
Instructions
- Preheat the oven to 325 F.
- In a medium saucepan over medium heat, heat the sugar, molasses and spices to boiling. Remove from heat and stir in the baking soda (the batter will puff up). Stir in the butter until melted.
- Stir in the egg, then the flour until a soft dough forms.
- Put a silicon baking mat on a flat surface and take about 1/4 of the dough and using a rolling pin, roll it out on the mat until it’s about 1/4 inch thick. Cut into the desired shape, making space for windows and trimming any excess and putting the excess dough back into the bowl.
- Slide the silicon mat onto a baking sheet and set in the oven. Unwrap hard candies for the stained glass windows and set them in the window spaces. Bake at 325 for about 12 minutes or until the gingerbread is nicely browned.
- Repeat with the rest of the dough to make all 4 sides of the house. (I used the last of the dough for a bit of rounding on the chimney.)
Notes
RECIPE SOURCE: http://www.sumptuousspoonfuls.com/
© Copyright 2016, Sumptuous Spoonfuls. All images & content are copyright protected. Please do not use my images without prior permission. If you want to publish any of my images, please ask first. If you want to republish this recipe as your own, please re-write the recipe in your own words or link back to this post for the recipe.

This post was shared at Weekend Potluck and Hearth & Soul Bloghop.

3 comments
I adore this! Wondering how you made the clear icicles from the chalet roof? I usually use white frosting for the roof but LOVE the realistic clear icicles…please share your technique!
Hi Elizabeth! I didn’t make the icicles, but my friend Dhanya, who did, said she made them of icing gel. She was sad that they didn’t seem to set (dry out enough) to use for several days. We were working on this project for a whole week and by the end of the week, they were finally drying up enough that she thought they might be usable. It’s a week later now and they are nice and dry (not sticky at all). I won’t see her until next week (after Christmas, alas!) or possibly even later, but I found this tutorial on it: http://www.howtocakethat.com/how-to-make-edible-clear-icicles.html
Good luck!
Ann
[…] the slopes. There are many different ways to do this, so have some fun with it and definitely use online inspiration to help you come up with your perfect ski […]